Cultivate Goal Tracking allows users to create automated goals to track learning actions that contribute to a configured goal this includes external goals that can be manually tracked within the learning platform. In this article, we dive into how to create goal tracking.
In this article:
Goal Tracking Overview
Creating a Goal Track
Goal Tracking Overview
Learning Admins can create a learning platform goal and can add the goal gadget to users dashboard to track progress on any goals they are involved in.
Creating a Goal Track
How to create a Learning goal
- From the administration dashboard click Social and then Goal Tracking.
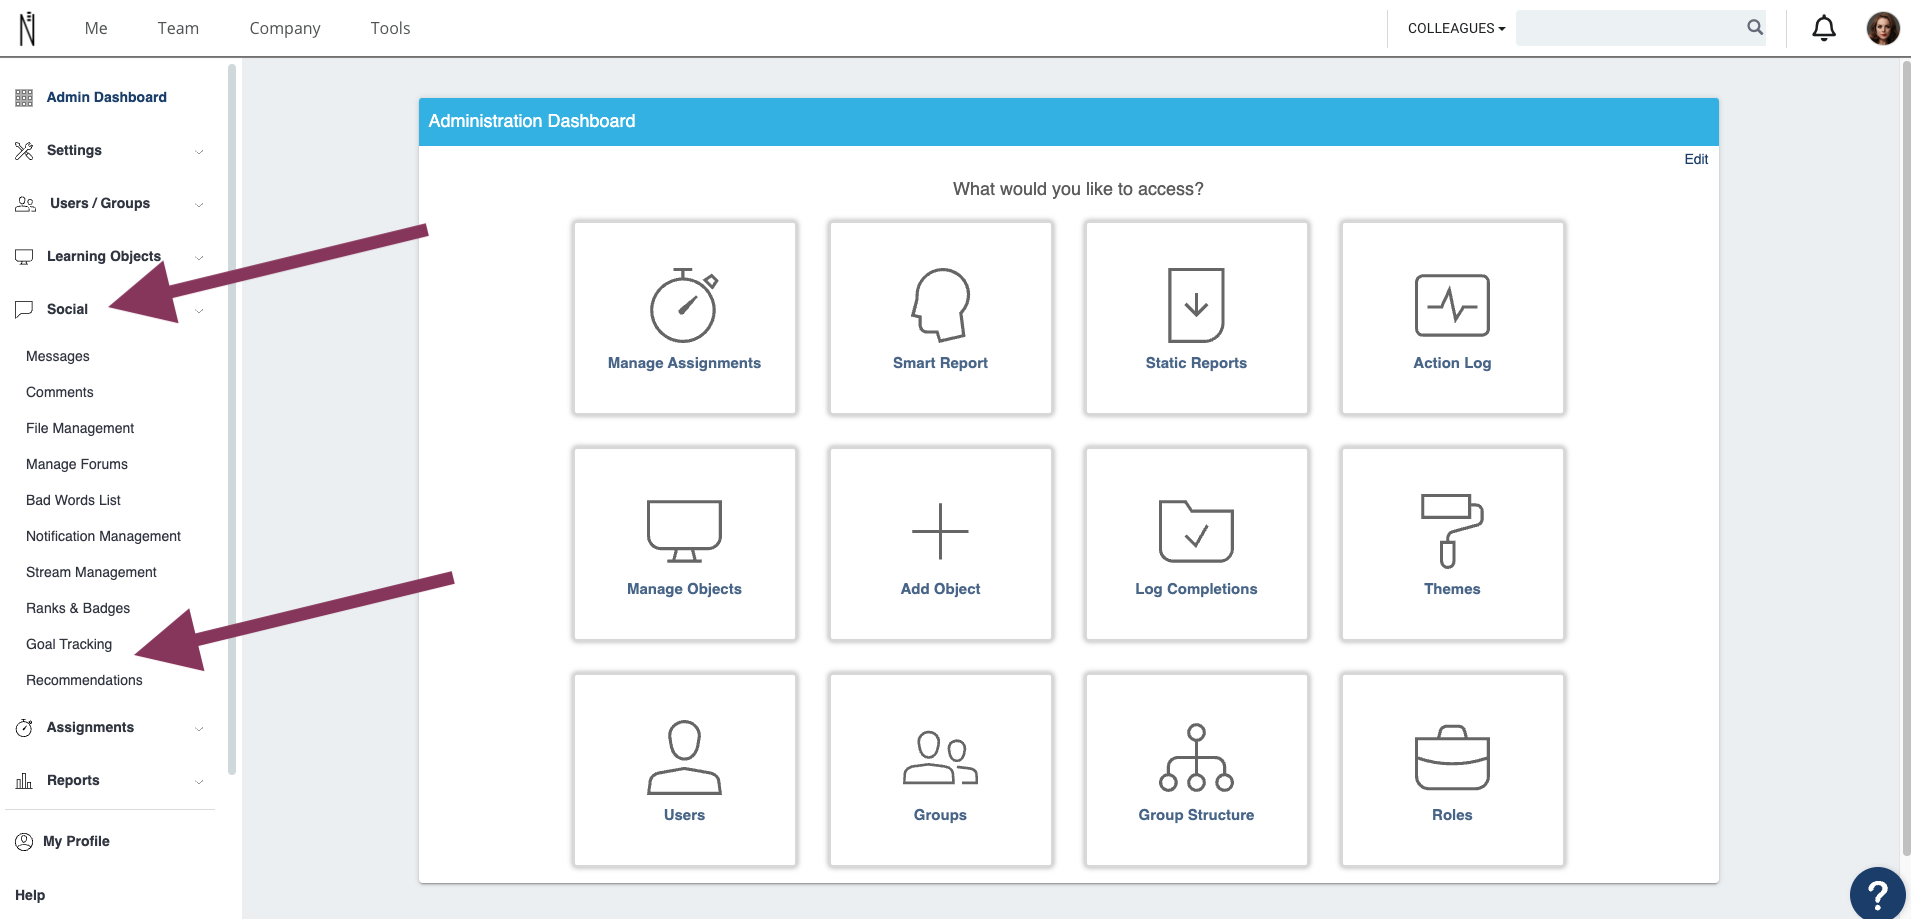
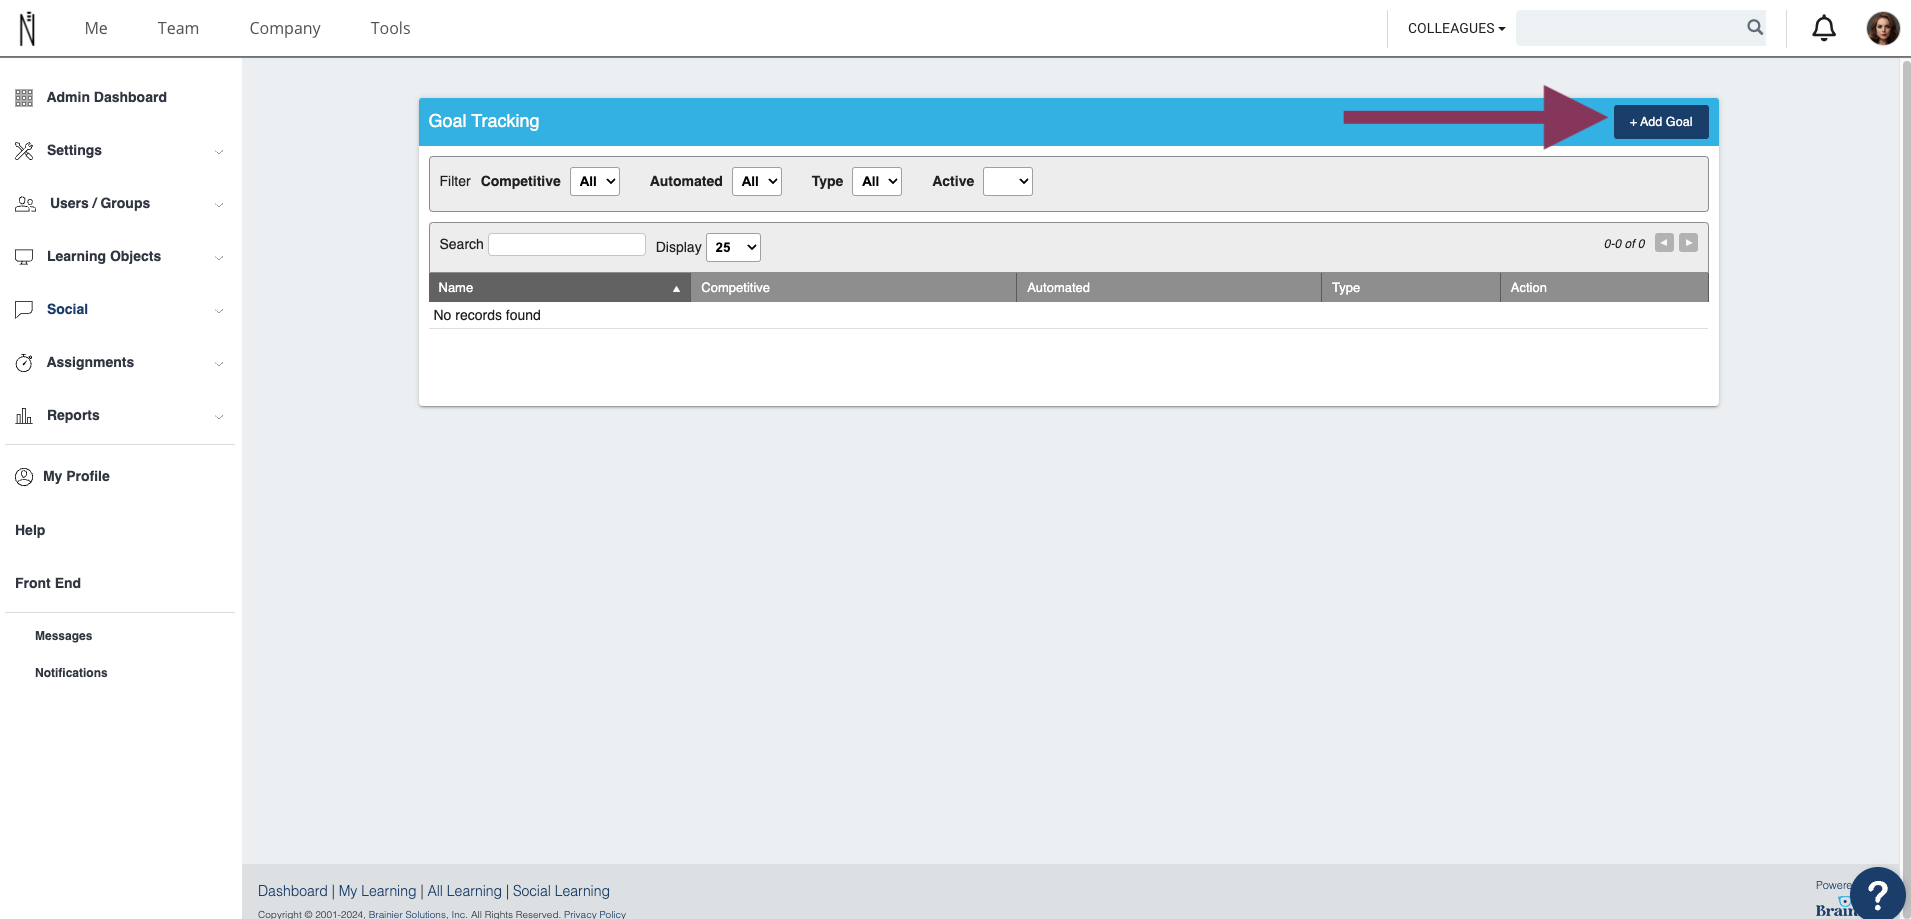
- Click Add Goal.
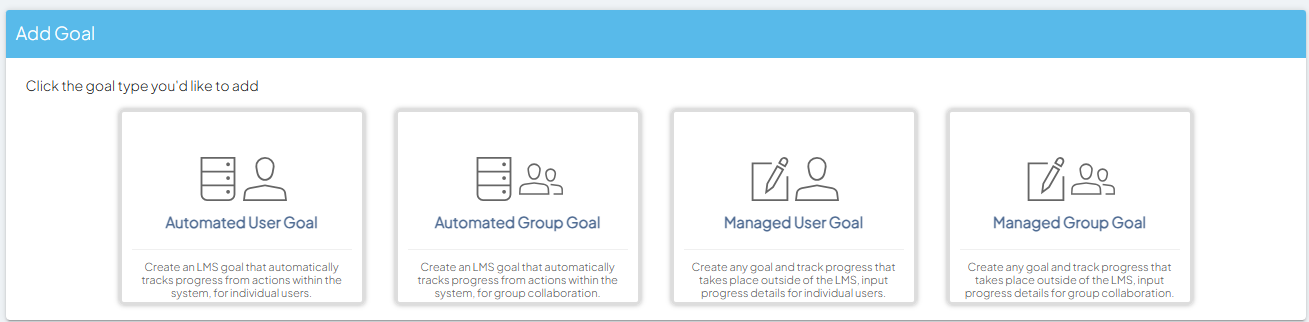
Automated User Goal: Create a learning platform goal for a user that automatically tracks progress.
Automated Group Goal: Create a learning platform goal for groups that automatically tracks progress.
Managed User Goal: Create a learning platform goal for a user and track the progress that takes place outside of the platform.
Managed Group Goal: Create a learning platform goal for groups that automatically tracks progress.
Creating a Goal
Automated Goals
Automated User Goal
The tabs are below:

|
Settings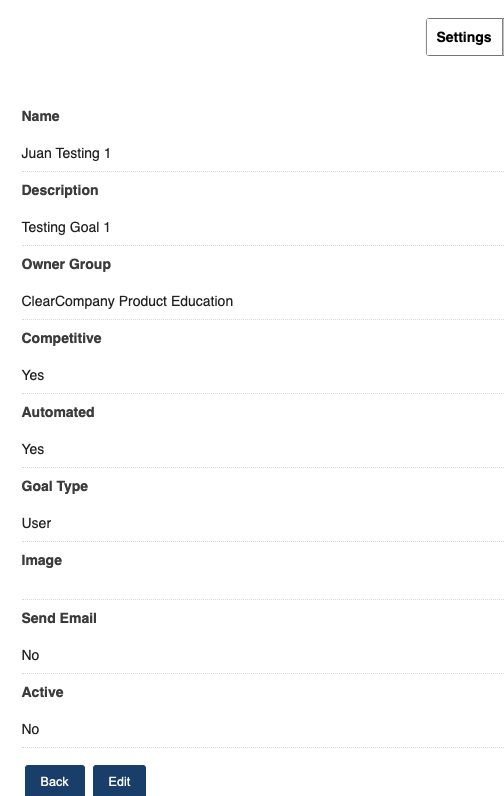
|
-
Name: Give a name to this goal
-
Description: Add a description (optional).
-
Owner group: Select the owner group.
-
Competitive :
-
Yes: Selected users will be able to see each other progress on the front end.
-
No: User will only see their own progress on the front end.
-
Image*: Add an image to the goal. This field will appear after saving.
-
Send Email*: Send a Completed Goal email. This field will appear after saving.
-
Active: Yes or No.
- Click Save.
|
Columns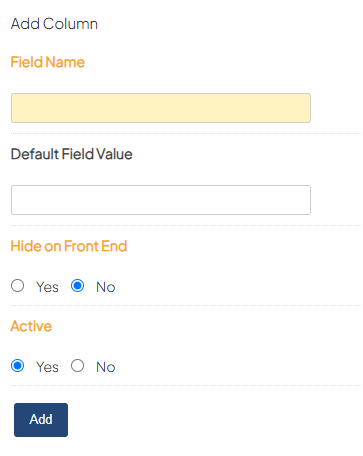 |
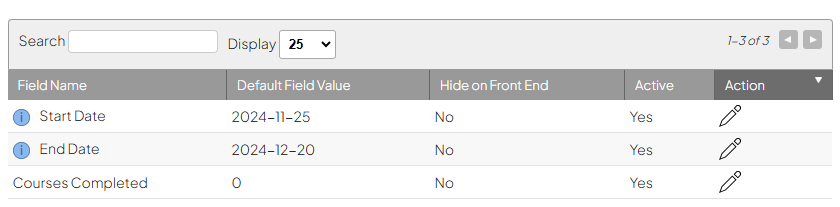
- Columns can be added to track other metrics during the goal process. Columns added to the goal will be manually managed.
-
Start/End Dates are default columns that set the timeframe for the goal to be achieved, click the pencil icon to set the dates.
- To add a new column create the information with the wizard on the right-hand side
- Field Name
- Default Field Value
-
Hide on Front End: If NO is selected users will see this column and the value.
- Active
- Click Add to add the column to the goal.
- Repeat the process until all columns are added
|
Conditions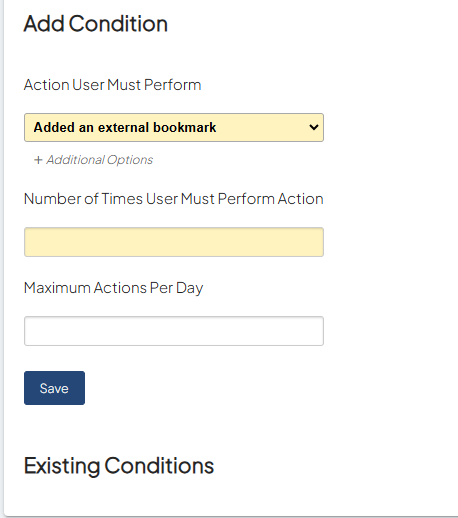 |
Add the conditions the users need to meet to achieve their goals. Fill out the fields below:
-
Action User Must Perform: Select an action from the dropdown menu
- *The Completed an Object action has more options to choose from (any or specific object, specific tags, or authors)
-
Number of Times User Must Perform Action: Set the number of times the user must perform the action.
-
Maximum Actions Per Day: Set a maximum action per day. For example, a user could perform the action 5 times in a day but only 1 will count towards the goal.
- Click Save.
- Repeat until all conditions for the goal have been added.
-
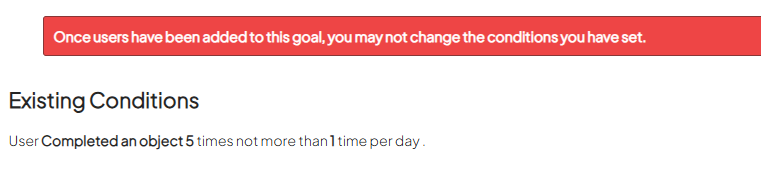
Note: To remove a condition from the goal, click the red x icon next to the existing condition.
|
After moving to the Users/Groups tab you can no longer change conditions. Ensure that all conditions have been added before adding users and groups to your goal.
|
| Users |
Assign the Users that have to complete the goal.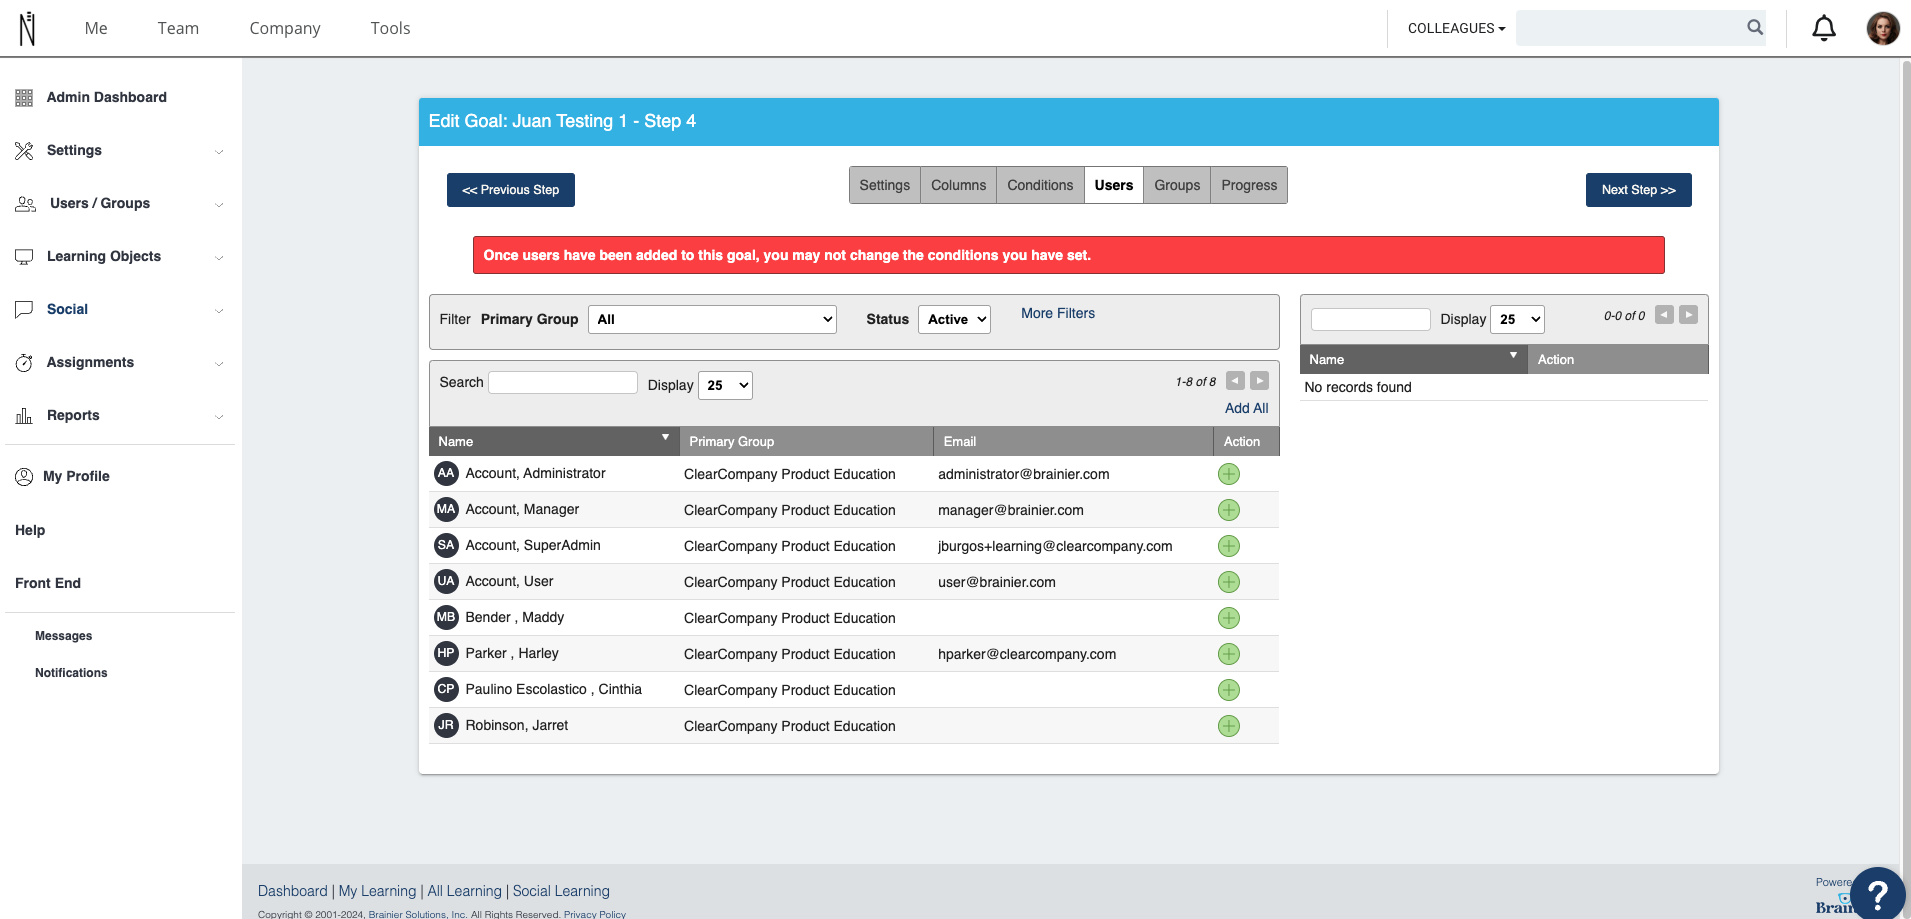
|
| Groups |
Assign the Groups that have to complete the goal.
|
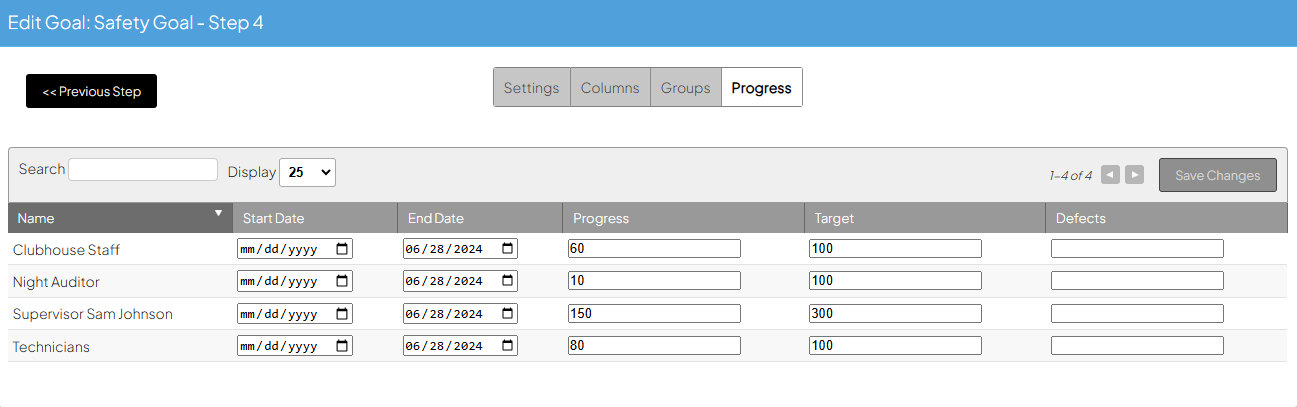
| Progress |
The Progress Tab allows admins to view all users who are part of this goal and their progress.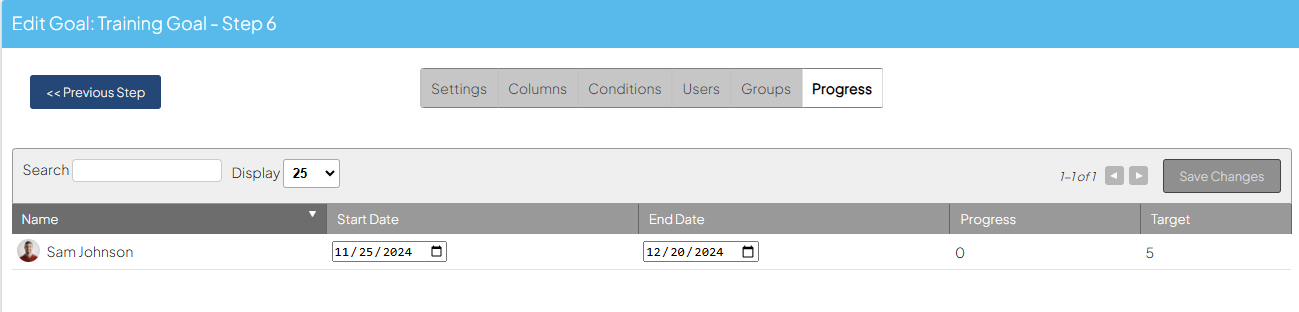
|
Automated Group Goal
Settings |
-
Name: Give a name to this goal
-
Description: Add a description (optional).
-
Owner group:
-
Competitive :
-
Yes: Members of the selected Groups will be able to see other Groups' progress on the front end.
-
No: Members of the selected Groups will only see their own group progress on the front end.
-
Image*: Add an image to the goal. This field will appear after saving.
-
Send Email*: Send a Completed Goal email. This field will appear after saving.
-
Active: Yes or No
- Click Save.
|
| Columns |
- Columns can be added to track other metrics during the goal process. Columns added to the goal will be manually managed. For more information on manually managed goals view the Manage User Goal Settings Section.
-
Start/End Dates are default columns that set the timeframe for the goal to be achieved, click the pencil icon to set the dates.
- To add a new column create the information with the wizard on the right-hand side
- Field Name
- Default Field Value
-
Hide on Front End: If NO is selected users will see this column and the value.
- Active
- Click Add to add the column to the goal.
- Repeat the process.
|
| Conditions |
Add the conditions that members of the Groups need to meet the group goal.
-
Action User Must Perform: Select an action from the dropdown menu
- *The Completed an Object action has more options to choose from (any or specific object, specific tags, or authors)
-
Number of Times User Must Perform Action: Set the number of times the members of the group must perform the action
-
Maximum Actions Per Day: Set a maximum of actions per day.
- Click Save.
- Repeat until all conditions for the goal have been added.
-
Note: To remove a condition from the goal, click the red x icon next to the existing condition.
|
| Groups |
Assign the Groups that have to complete the goal.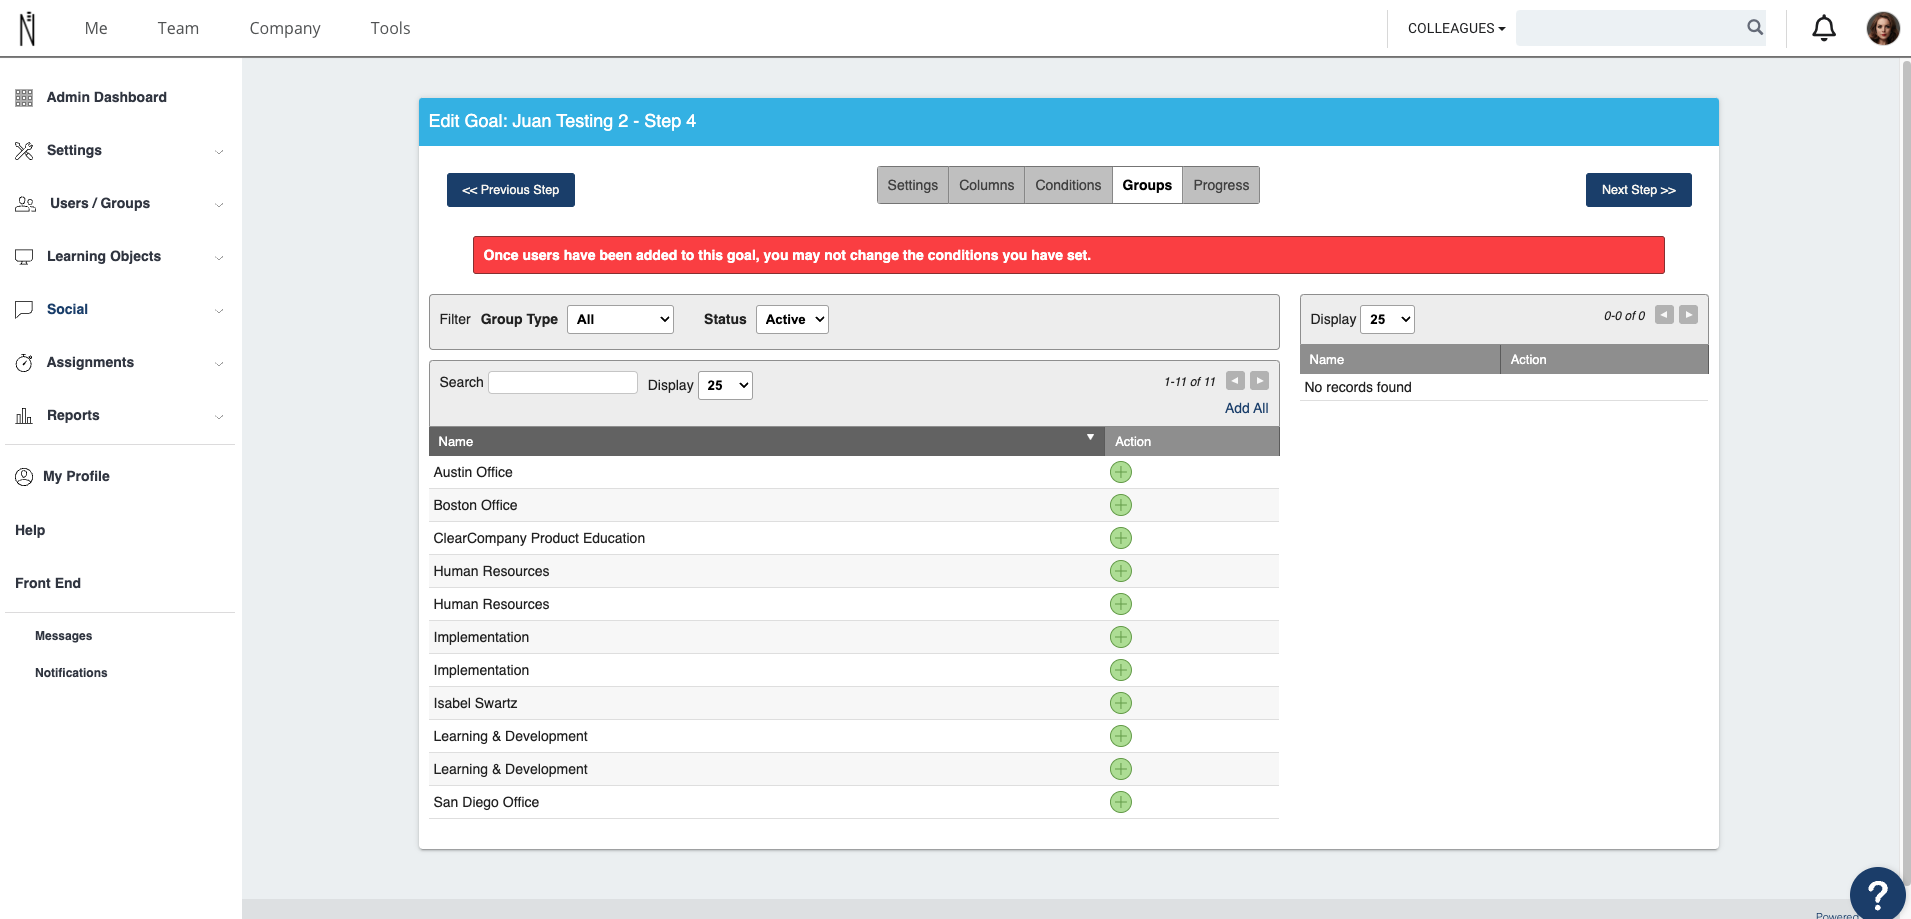
|
| Progress |
The Progress Tab allows admins to view all groups who are part of this goal and their progress.
|
Managed Goals
Managed User Goal
This is for actions that take place outside of the learning platform. Managed Goals will need to be updated by an admin/manager regularly.
Settings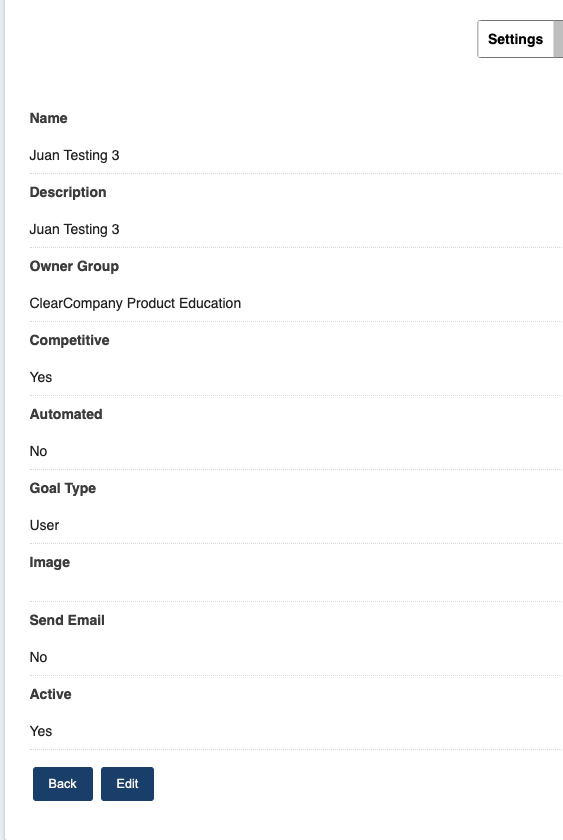 |
-
Name: Give a name to this goal
-
Description: Add a description (optional)
-
Owner Group: Select your owner group.
-
Competitive
- Yes: Selected users will be able to see each other progress (frontend).
- No: User will only see their own progress (frontend).
-
Image*: Add an image to the goal. This field will appear after saving.
-
Send Email*: Send a Completed Goal email. This field will appear after saving.
-
Active: Yes or No
- Click Save.
|
| Columns |
- Columns can be added to track other metrics during the goal process.
-
Goal Target sets the objective of the goal. Required.
-
Goal Progress Set a default value or leave it blank if all users in the goal will start from 0. Required.
-
Start Date/End Date Set the start date and end date of the goal.
-
Hide on Front End:
- NO: Users will see this column and the value.
- Add more columns if needed.
- Click Save.
|
| Users |
Assign the Users that have to complete the goal.
|
| Groups |
Assign the Groups that have to complete the goal. 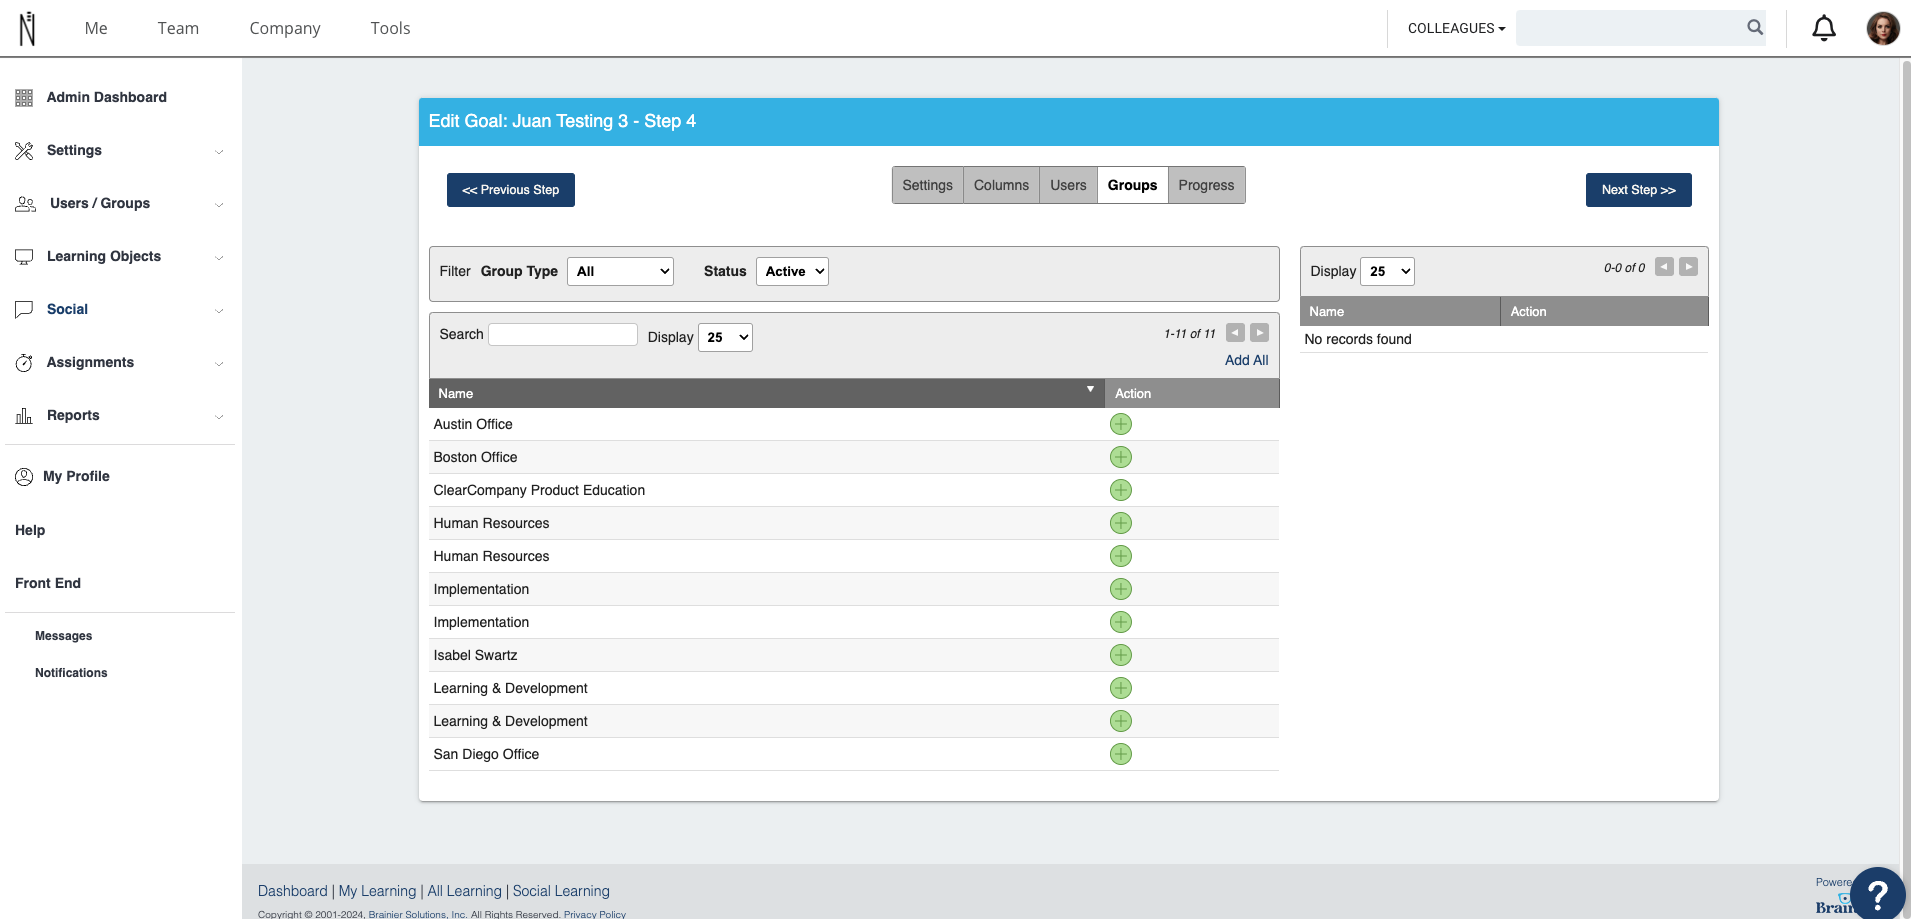
|
| Progress |
The Progress Tab allows admins to track and update the users’ progress.

|
Comments
Please sign in to leave a comment.